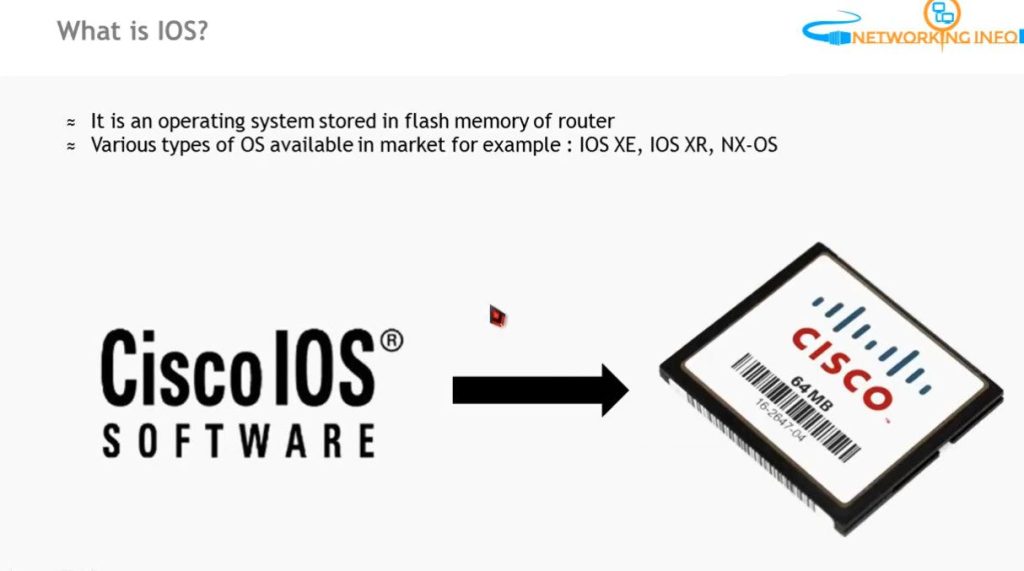
Cisco Switch & Router Backup / Restore / Upgarde
How to Installing an IOS
(Internetwork Operating System) on a Cisco router involves several steps. Here’s a simplified guide:
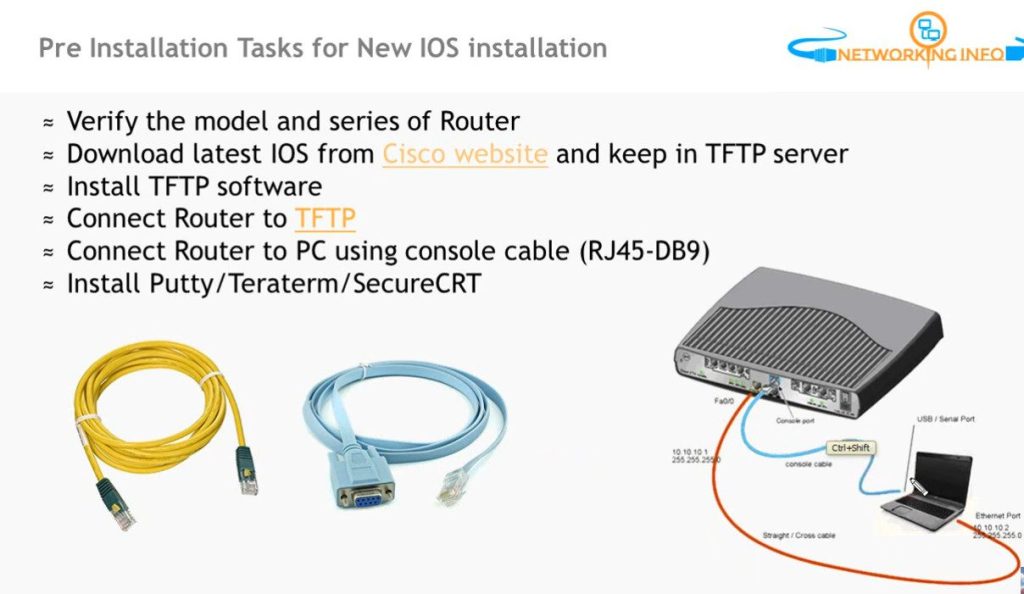
Prerequisites
- Router: Ensure your Cisco router is compatible with the IOS version you plan to install.
- IOS Image: Obtain the IOS image file (typically a
.binfile). - TFTP Server: Set up a TFTP server on your PC.
- Console Cable: Connect your PC to the router via a console cable.
- Terminal Emulator: Use a terminal emulator like PuTTY, Tera Term, or HyperTerminal.
Step-by-Step Installation
Connect to the Router:
- Use your terminal emulator to connect to the router’s console port.
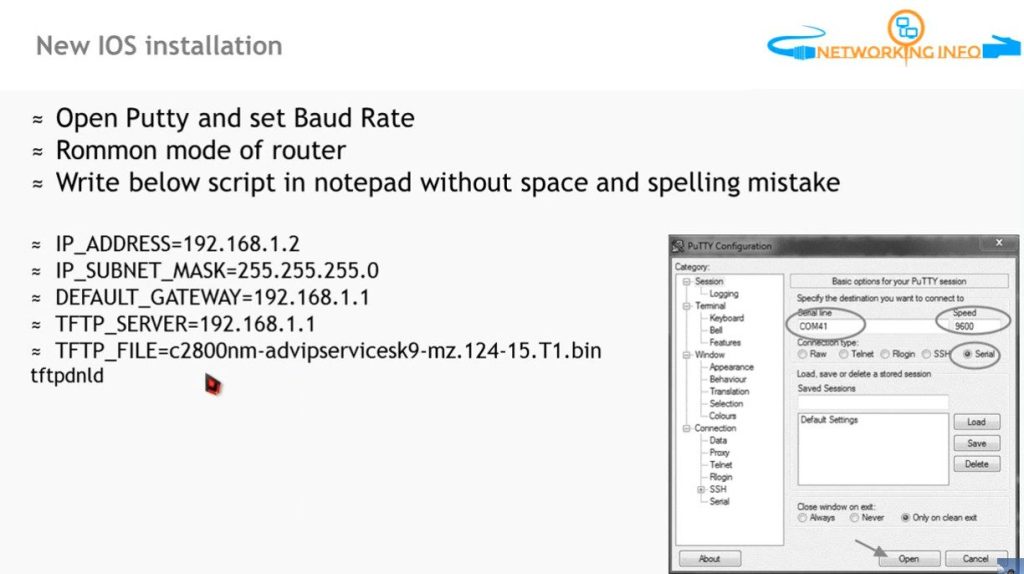
Enter ROMMON Mode (if necessary):
- If the router does not boot, you may need to interrupt the boot sequence by pressing
Ctrl + Break. This will take you to ROMMON mode.
- If the router does not boot, you may need to interrupt the boot sequence by pressing
Configure TFTP Settings:
In ROMMON mode, set the IP address of the router and the TFTP server
IP_ADDRESS=192.168.1.1 <Router IP Address>
IP_SUBNET_MASK=255.255.255.0 <Router Subnet Mask>
DEFAULT_GATEWAY=192.168.1.254 <Router Gateway Address>
TFTP_SERVER=192.168.1.100 <TFTP Server IP Address>
TFTP_File=iosvbgfjuyng2rrgh.bin <IOS Bin File Path>
tftpdnld <Copy the IOS Image Last Commnd>
boot <Boot Commnd For IOS To Ram>
How To IOS Upgrade Process
Upgrading Cisco IOS on a router involves a few key steps to ensure a smooth transition to a newer version. Here’s a step-by-step guide for upgrading IOS:
Prerequisites
- IOS Image: Download the desired IOS image file from Cisco’s website.
- TFTP Server: Set up a TFTP server on your computer.
- Console Connection: Connect to the router using a console cable.
- Backup: Back up the current configuration.
Step-by-Step Upgrade Process
Connect to the Router:
- Open a terminal emulator (like PuTTY or Tera Term) and connect to the router via the console port.
Check Current IOS Version:
- Use the following command to check the current IOS version:
Commnd——
show version
Backup Current Configuration:
- It’s good practice to back up your current configuration:
Commnd—–copy running-config startup-config
copy startup-config tftpCopy the New IOS Image to the Router:
- Use the TFTP server to transfer the new IOS image. First, configure the router’s interface with an IP address:
Commnd—
conf t
interface <interface_name>
ip address <ip_address> <subnet_mask>
no shutdown
exit- Then copy the IOS image:
copy tftp: flash:
- Follow the prompts to enter the TFTP server IP and the filename of the IOS image.
Verify the New IOS Image:
- dir flash:
Set the Boot Variable:
- Set the router to boot from the new IOS image:
- conf t
boot system flash flash:<your_ios_image.bin>
exit
- conf t
Save the Configuration:
- Save the updated configuration Commnd : write memory
Reboot the Router:
- Reload the router to apply the new IOS: reload
- Set the router to boot from the new IOS image:
Post-Upgrade Checks
- show version
Troubleshooting Tips
- If the router fails to boot, access ROMMON mode and check your settings.
- Make sure the TFTP server is reachable and the IOS image is compatible with your router model.
- If needed, you can use
conf tandboot systemcommands to revert to the previous IOS image if the new one doesn’t work.
fsjhfkjshgffh.bin
write
Notes- First Setup Router Interfaces IP Address Then working TFTP Server
1. Router Configuration Backup
copy nvram: tftp:
source filename startup-config
Address remote host 192.168.1.100
Destination filename enter
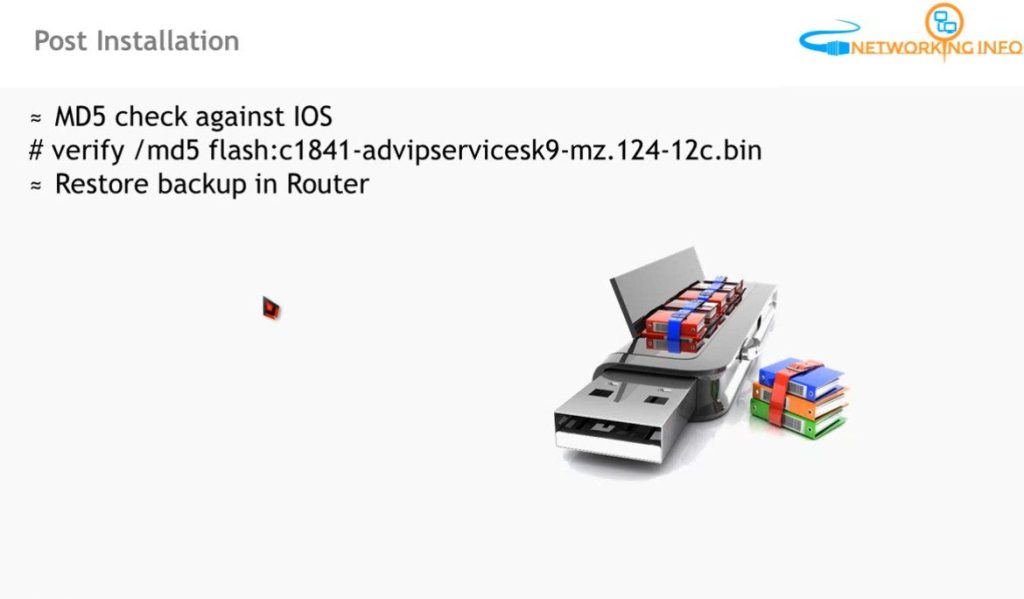
2. Router Configuration Restore
Notes- Router IP Setup
copy tftp: nvram
Address remote host 192.168.1.100
Source filename Itindex-confg
Destination filename enter
How To Backup Switch Configuration
Switch Configuration Backup
copy runnig-config tftp:
Address remote host 192.168.1.100
Destination filename enter
Switch Configuration Restore
copy tftp: runnig config
Address remote host 192.168.1.100
Source filename Itindex-confg
Destination filename enter