
How to Enable and Use SSH on Ubuntu 22.04
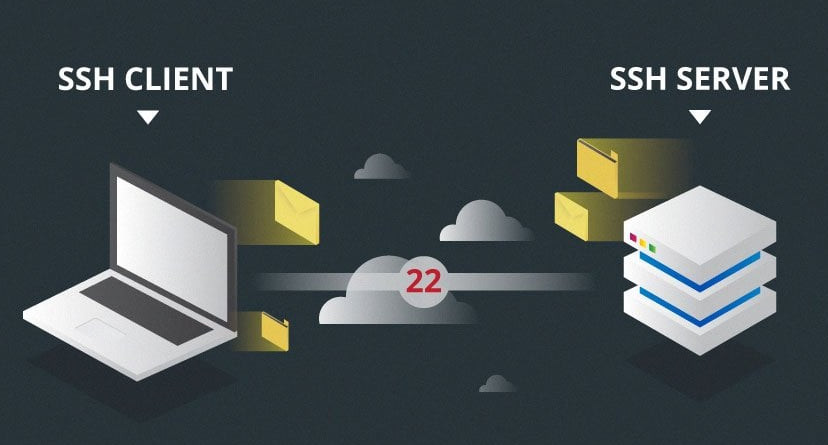
SSH (Secure Shell) is a cryptographic network protocol used for securely accessing and managing devices over an unsecured network, like the internet. It provides a secure channel over which data can be transmitted, preventing eavesdropping, tampering, and other attacks. SSH is commonly used to:
Remote Login: It allows users to securely log in to remote computers or servers to manage files, run commands, or execute applications.
File Transfer: With tools like SCP (Secure Copy Protocol) or SFTP (Secure File Transfer Protocol), SSH enables secure file transfers between computers.
Port Forwarding/Tunneling: SSH can forward network traffic securely, which is useful for accessing resources behind firewalls or secure networks.
Key Features of SSH:
Encryption: SSH encrypts the entire session, ensuring that sensitive data like passwords or file contents cannot be intercepted by unauthorized parties.
Authentication: SSH uses various methods like passwords, public-key authentication, or certificate-based authentication to verify the identity of users or systems.
Integrity: SSH ensures data integrity by using cryptographic techniques to detect and prevent tampering with data in transit.
Common SSH Usage:
Connecting to remote servers: Administrators and developers use SSH to manage remote systems.
Managing services: SSH is widely used to configure services or troubleshoot remote servers.
Automating tasks: SSH allows scripts to be executed securely on remote machines, useful for automating system updates, backups, or deployment processes.
Step 1: Update Ubuntu Repositories
First, update all system repositories to ensure that all packages are up to date. In this way, no conflicts will occur during the OpenSSH server package installation.
sudo apt update
Step 2: Install OpenSSH Server
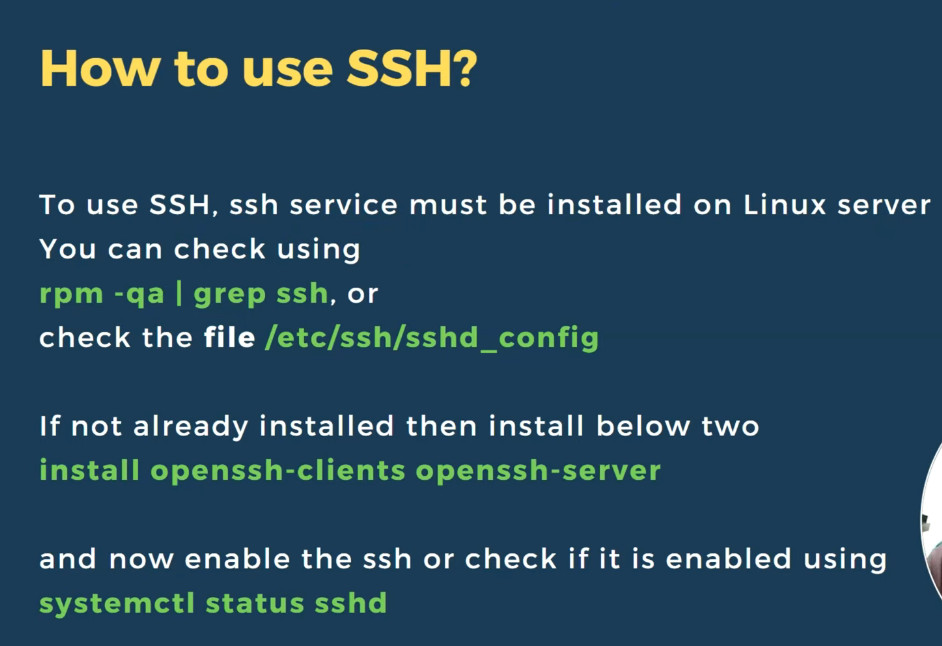
SSH server is not installed and enabled by default in Ubuntu 22.04 LTS. So, we will install the OpenSSH server from the default Ubuntu packages repository and then enable the SSH connections. Type the following command to install the OpenSSH server package on Ubuntu 22.04 system:
sudo apt install openssh-server
Step 3: Check the Status SSH Service
The “system” unit controls the SSH service on all the latest Ubuntu distributions. Therefore, you can use the “systemctl” commands to control the SSH service.
To start or stop the SSH service, use the following command
					sudo systemctl start ssh
sudo systemctl stop ssh
Similarly, if you want to verify whether the ssh service is running on your system or not. You can also check SSH service status using the following command:
sudo systemctl status ssh
Or you can restart it using this command:
sudo systemctl restart ssh
Step 4: Configure SSH Port in Firewall UFW
The firewall UFW should be enabled and activated on your Ubuntu system. Enable the firewall UFW settings if it is not enabled on your Ubuntu system using this command:
sudo ufw enable
After enabling the UFW setting, allow ssh port 22 in the UFW firewall using this command:
sudo ufw allow 22/tcp
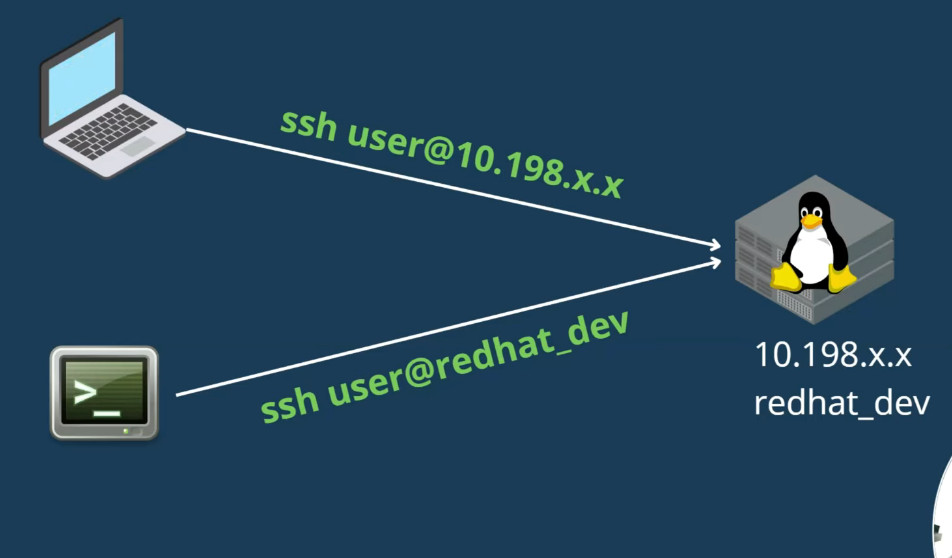
Step 5: Connect to SSH Server on Ubuntu 22.04 LTSAfter enabling the SSH server, you can use it to initiate remote connections and can also accept incoming connection requests. Use the following ssh command to connect SSH server remotely:
ssh username@remotehost or IP-address
For example, here, we will connect to the Ubuntu 22.04 SSH server with an IP address 10.0.2.15 as the user “samreena”:
ssh samreena@10.0.2.15
How to Disable the SSH on Ubuntu 22.04 LTS?
sudo ufw deny 22/tcp
To completely disable the SSH service access on Ubuntu 22.04 system, execute the following “systemctl” command:
					sudo systemctl stop ssh --now
sudo systemctl disable ssh --no
How to change the SSH port
How to change the SSH port
SSH, or Secure Shell, is an essential protocol for securely accessing and managing remote servers. It encrypts all communication, ensuring that data remains protected from unauthorized interception.
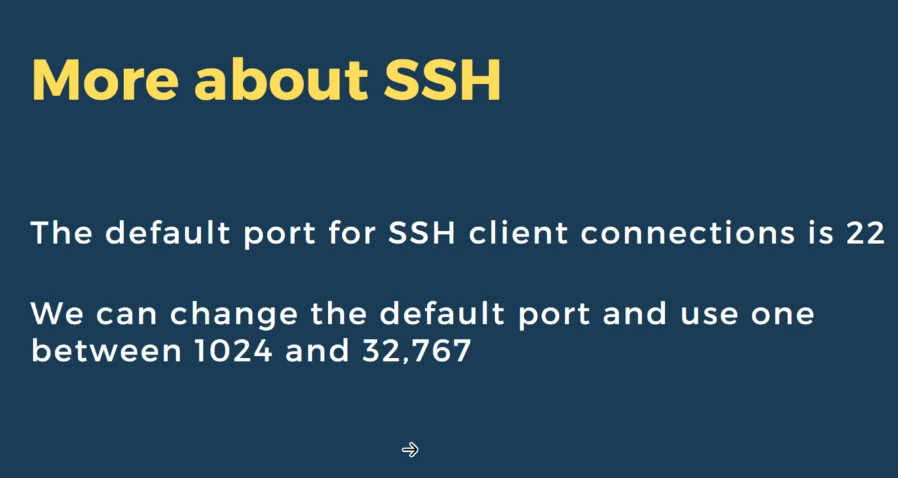
By default, SSH runs on port 22, which is often targeted by brute force attacks. Changing the default SSH port can significantly enhance security by reducing the likelihood of automated attacks.
This article will guide you through all the steps to changing the SSH port on a Linux virtual private server (VPS), from selecting the appropriate new port to ensuring your server remains accessible after the change.
Choosing a new SSH port
It’s important to select a port that is not already in use by other services to avoid potential conflicts and reduce security risks on your VPS. Here are some of the most commonly used port numbers with their associated services and protocols:
| Port number | Service | Protocol |
| 20 | FTP (data transfer) | TCP |
| 21 | FTP (control) | TCP |
| 22 | SSH | TCP |
| 23 | Telnet | TCP |
| 25 | SMTP | TCP |
| 53 | DNS | TCP/UDP |
| 67/68 | DHCP | UDP |
| 69 | TFTP | UDP |
| 80 | HTTP | TCP |
| 110 | POP3 | TCP |
| 123 | NTP | UDP |
| 137/138/139 | NetBIOS | TCP/UDP |
| 143 | IMAP | TCP |
| 161/162 | SNMP | TCP/UDP |
| 179 | BGP | TCP |
| 389 | LDAP | TCP/UDP |
| 443 | HTTPS | TCP |
| 636 | LDAPS | TCP/UDP |
| 989/990 | FTPS | TCP |
| 3306 | MySQL | TCP |
| 8080 | Alternative to HTTP (web) | TCP |
| 8443 | Alternative to HTTPS (web) | TCP |
Linux 1. Common Service Ports
1.1. Remote Access and Management
SSH (Secure Shell) Port 22 Used for secure remote access and command-line interface.
Telnet Port 23: Used for remote access (insecure, less commonly used today).
RDP (Remote Desktop Protocol) Port 3389: Used for remote desktop access, although this is more common on Windows, Linux systems might use it through remote desktop solutions.
1.2 File Transfer
– FTP (File Transfer Protocol)
– Port 21: Used for FTP control commands.
– Port 20: Used for FTP data transfer (active mode).
– SFTP (SSH File Transfer Protocol)
– Port 22: Used for secure file transfer over SSH.
– SCP (Secure Copy Protocol)
– Port 22: Uses SSH for secure file transfer.
-rsync
– Port 873: Used for file synchronization.
1.3. Web and HTTP Services
-HTTP (Hypertext Transfer Protocol)
– Port 80: Used for unencrypted web traffic.
– HTTPS (Hypertext Transfer Protocol Secure)
– Port 443: Used for encrypted web traffic.
– HTTP Alternate Port
– **Port 8080**: Commonly used as an alternative to port 80 for HTTP.
1.4. Email Services
– SMTP (Simple Mail Transfer Protocol)
– Port 25: Used for sending email.
– IMAP (Internet Message Access Protocol)
– Port 143: Used for retrieving email.
– IMAPS (IMAP Secure)
– Port 993: Used for secure email retrieval.
– POP3 (Post Office Protocol)
– Port 110: Used for retrieving email.
– POP3S (POP3 Secure)
– Port 995: Used for secure email retrieval.
1.5. Database Services
– MySQL/MariaDB
– Port 3306: Used for database connections.
– PostgreSQL
– Port 5432: Used for database connections.
– MongoDB
– Port 27017: Used for database connections.
– Redis
– Port 6379: Used for in-memory data structure store.
1.6. Network Services
– DNS (Domain Name System)
– Port 53: Used for DNS queries.
– DHCP (Dynamic Host Configuration Protocol)
– Port 67 (Server): Used for receiving DHCP requests from clients.
– Port 68 (Client): Used for receiving DHCP responses from servers.
– NTP (Network Time Protocol)
– Port 123: Used for time synchronization.
1.7. System Monitoring and Management
– SNMP (Simple Network Management Protocol)
– Port 161: Used for SNMP queries.
– Port 162: Used for SNMP traps.
– Syslog
– Port 514: Used for logging system messages.
Additionally, consider selecting a port outside the well-known range (0-1023) and the registered ports range (1024-49151). It’s advisable to opt for a custom port within the dynamic or private ports range (49152-65535)
How to change the default SSH port
Now that you have chosen a new port, let’s proceed with the steps to implement the change.
1. Access your server via SSH
Before you can make any changes, you need to access your server securely. Follow these steps to connect to your server via SSH:
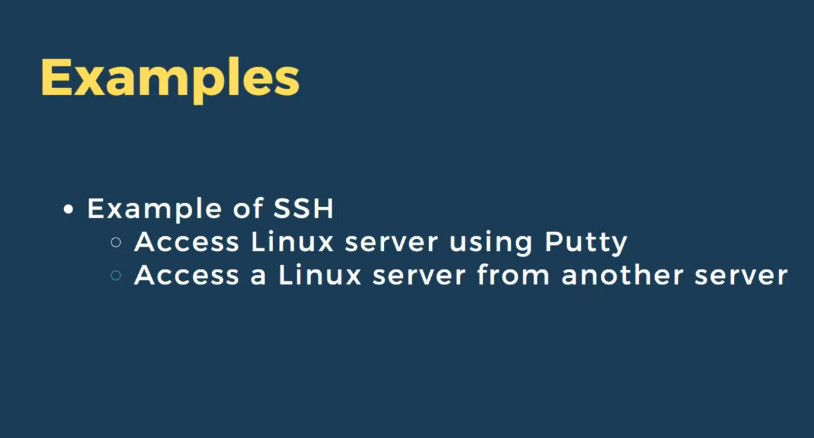
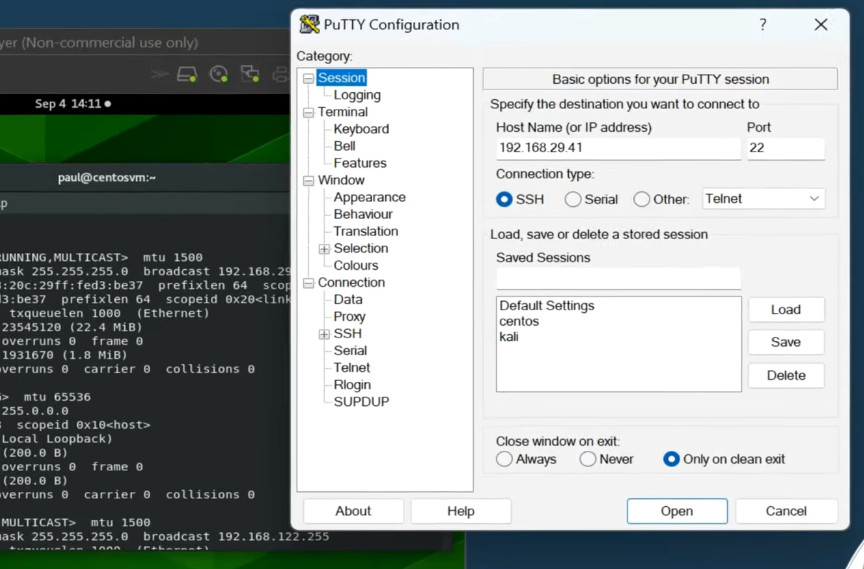
Whether you’re using Windows, macOS, or Linux, start by opening a new terminal window. On Windows, you may need an SSH client like PuTTY.
Use the following command to connect to your server. Replace username with your actual server username and server_ip with your server’s IP address:
ssh username@server_ip
Enter the password associated with the username you provided. For enhanced security, it is recommended to use SSH keys instead of passwords.
2. Edit the SSH configuration file
Once you’ve successfully accessed your server, the next step is modifying the SSH configuration to use a new port. This involves editing the sshd_config file, which controls various parameters of your SSH daemon.
Use the following command to open the SSH daemon configuration file in the nano text editor:
sudo nano /etc/ssh/sshd_config
- Scroll down until you find the line that includes #Port 22. This line is commented out by default, and the number 22 represents the default port.
- Remove the # to uncomment this line and change 22 to your desired port number, such as 61189.
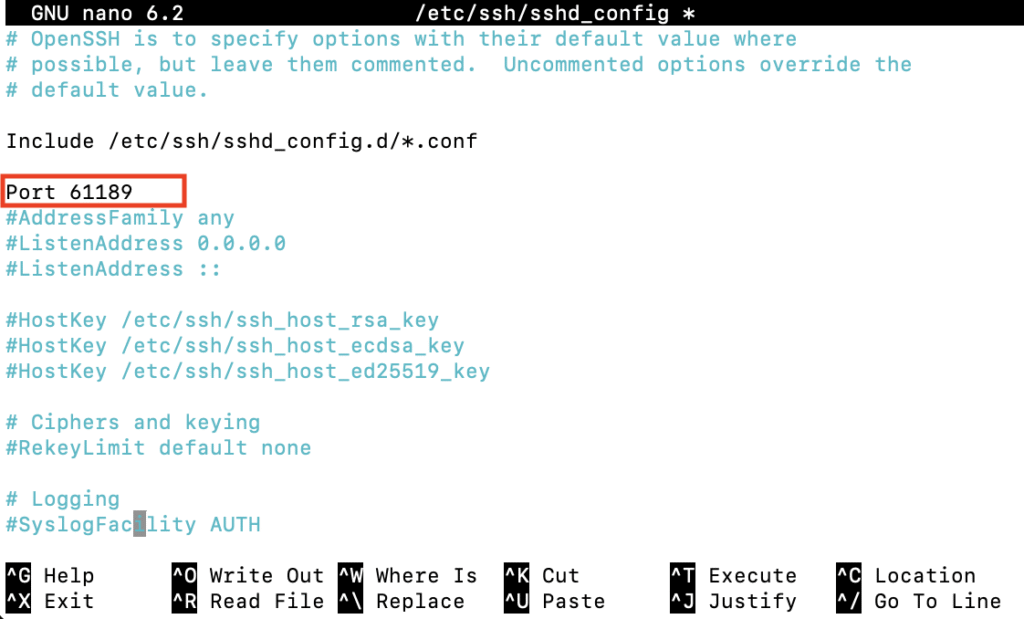
Once done, press Ctrl + X → Y → Enter to save the changes and exit nano.
How to enable ssh root access
					sudo nano /etc/ssh/sshd_config
PermitRootLogin yes
sudo service ssh restart
passwd root <Change Root Password></Change>
3. Adjust firewall settings
After updating your SSH port, it’s essential to adjust your firewall settings to allow traffic on the new port. However, if you’ve never configured any firewall rules, you can skip this step and proceed to the next section.
Here’s how to update firewall settings using Uncomplicated Firewall (UFW):
- Execute the following command to allow incoming connections on your new port over TCP, replacing 61189 with your specific port:
sudo ufw allow 61189/tcp
- Reload UFW to apply the changes:
sudo ufw reload
4. Restart the SSH service
Once you’ve updated the SSH configurations and firewall rules, it’s time to restart the SSH service to apply the new settings.
For systems using systemd, which is common in newer distributions like Ubuntu, Debian, and CentOS, restart the SSH service by running the following command:
sudo systemctl restart sshd
For older systems that use SysVinit, use this command instead:
sudo service ssh restart
After restarting, verify the SSH service status to make sure everything is running smoothly:
sudo systemctl status sshd
5. Verify the new port
Now that you’ve restarted the SSH service, the final step is verifying that SSH is indeed operating on the new port. This ensures that your changes have been successfully implemented and the server is accessible.
Check the SSH port with ss or netstat
If you have ss installed, use the following command to list active connections, filtering for your new SSH port:
ss -tuln | grep [new_port_number]
Here’s the output you might see:

If you prefer using the netstat command, you can check with:
netstat -tuln | grep [new_port_number]
The output should resemble:

Log in using the new port
Open a new terminal window to test connecting to the server with the new SSH port number by executing this command:
ssh -p new_port_number username@server_ip
Replace new_port_number, username, and server_ip with your specific details.
A successful SSH connection using the new port confirms that your server is functioning correctly with the changes.
Why should I change the default SSH port?
Changing the default port for SSH reduces your server’s visibility to automated attacks and port scans, enhancing security for sensitive data and root access.
What is the best port to choose when changing the default SSH port?
Choose a port above 1024 that isn’t used by the most common privileged services to minimize conflicts and reduce exposure to attacks.
Will changing the SSH port affect my server’s performance?
Changing the SSH port does not affect Linux server performance. It merely alters the entry point for SSH connections to improve security.
SSH Few More Commnds
					sudo apt update
sudo apt install openssh-server
sudo service ssh status
sudo service ssh start
sudo service ssh stop
sudo systemctl enable ssh
sudo systemctl disable ssh
sudo ufw allow ssh
ssh -v [user]@[remote_host]
ssh saikat@202.203.10.1 -p22
sudo systemctl restart sshd.service
sudo nano /etc/ssh/sshd_config
Slide

What Is SSH
SSH, or Secure Shell Protocol, is a remote administration protocol that allows users to access, control, and modify their remote servers over the internet.
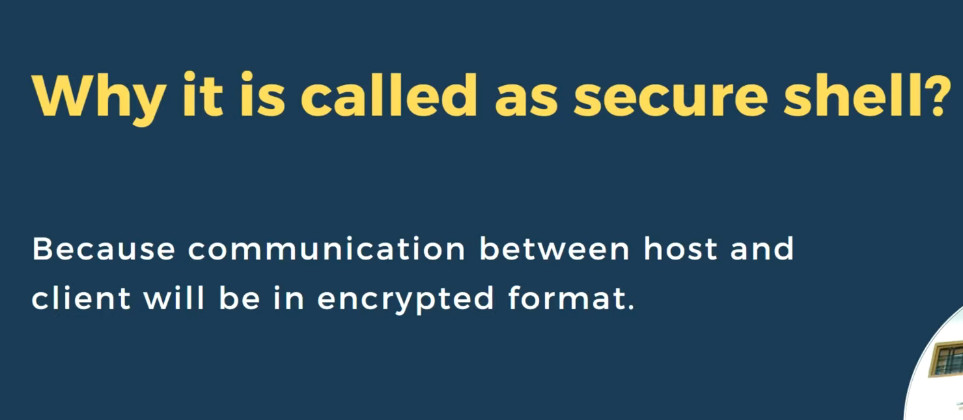
SSH service was created as a secure replacement for the unencrypted Telnet and uses cryptographic techniques to ensure that all communication to and from the remote server happens in an encrypted manner. It provides a mechanism for authenticating a remote user, transferring inputs from the client to the host, and relaying the output back to the client.
The example below shows a typical SSH prompt. Any Linux or macOS user can SSH into their remote server directly from the terminal window. Windows users can take advantage of SSH clients like Putty. You can execute shell commands in the same manner as you would if you were physically operating the remote computer.
Understanding Different Encryption Techniques
The significant advantage offered by SSH over its predecessors is the use of encryption to ensure a secure transfer of information between the host and the client. Host refers to the remote server you are trying to
access, while the client is the computer you are using to access the host. There are three different encryption technologies used by SSH:
- Symmetrical encryption
- Asymmetrical encryption
- Hashing
Symmetric Encryption
Symmetric encryption is a form of encryption where a secret key is used for both encryption and decryption of a message by both the client and the host. Effectively, anyone possessing the key can decrypt the message being transferred.
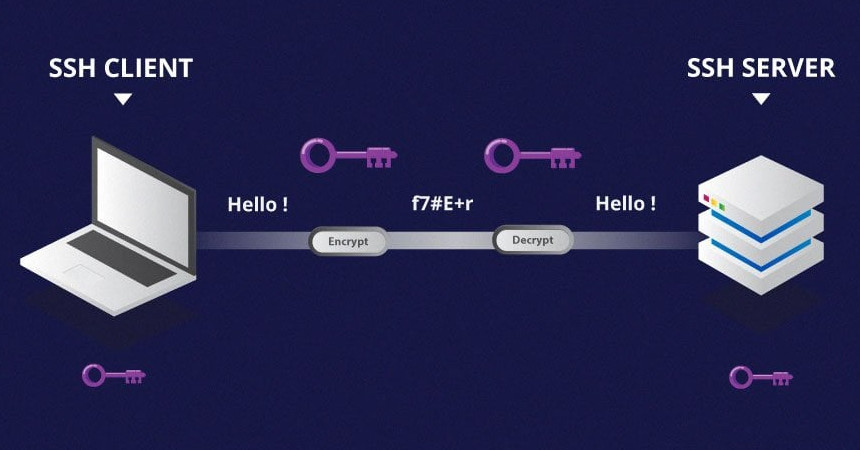
Symmetrical encryption is often called shared key or shared secret encryption. There is usually only one key that is used, or sometimes a pair of keys, where one key can easily be calculated using the other key.
Symmetric keys are used to encrypt the entire communication during an SSH session. Both the client and the server derive the secret key using an agreed method, and the resultant key is never disclosed to any third party.
The process of creating a symmetric key is carried out by a key exchange algorithm. What makes this algorithm particularly secure is the fact that the key is never transmitted between the client and the host.
Instead, the two computers share public pieces of data and then manipulate it to independently calculate the secret key. Even if another machine captures the publically shared data, it won’t be able to calculate the key because the key exchange algorithm is not known.
It must be noted, however, that the secret token is specific to each SSH session, and is generated prior to client authentication. Once the key has been generated, all packets moving between the two machines must be encrypted by the private key. This includes the password typed into the console by the user, so credentials are always protected from network packet sniffers.
A variety of symmetrical encryption ciphers exist, including, but not limited to, AES (Advanced Encryption Standard), CAST128, Blowfish, etc. Before establishing a secured connection, the client and a host decide upon which cipher to use, by publishing a list of supported ciphers in order of preference. The most preferred cipher – from the clients supported ciphers – that is present on the host’s list is used as the bidirectional cipher.
For example, if two Ubuntu 14.04 LTS machines are communicating with each other over SSH, they will use aes128-ctr as their default cipher.
Asymmetric Encryption
Unlike symmetrical encryption, asymmetrical encryption uses two separate keys for encryption and decryption. These two keys are known as the public key and the private key. Together, both these keys form a public-private key pair.
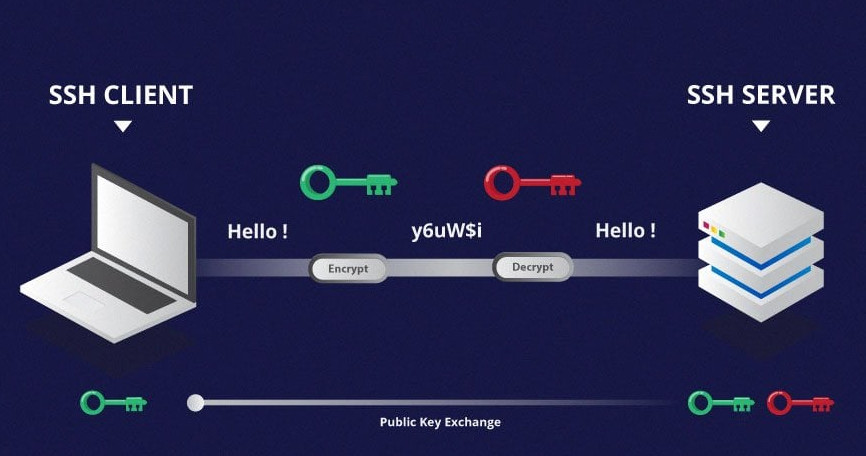
A public key can be used by any individual to encrypt a message and can only be decrypted by the recipient who possesses their particular private key, and vice versa. These consist of extensive and seemingly random combinations of numbers and symbols, however, both public and private keys are paired using complex mathematical algorithms.
For example, in order to authenticate the sender, a message is encrypted using their own private key. Therefore, the message can only be decrypted using that specific sender’s public key. Note that both encryption and decryption mechanisms are automatic processes – you don’t need to do anything manually.
Unlike the general perception, asymmetrical encryption is not used to encrypt an entire SSH session. Instead, it is used during the key exchange algorithm of symmetric encryption. Before initiating a secured connection, both parties generate temporary public-private key pairs and share their respective private keys to produce the shared secret key.
Once a secured symmetric communication has been established, the server uses the client’s public key to generate and challenge and transmit it to the client for authentication. If the client can successfully decrypt the message, it means that it holds the private key required for the connection – the SSH session then begins.
Hashing
One-way hashing is another form of cryptography used in Secure Shell Connections. One-way-hash functions differ from the above two forms of encryption in the sense that they are never meant to be decrypted. They generate a unique value of a fixed length for each input that shows no clear trend which can be exploited. This makes them practically impossible to reverse.
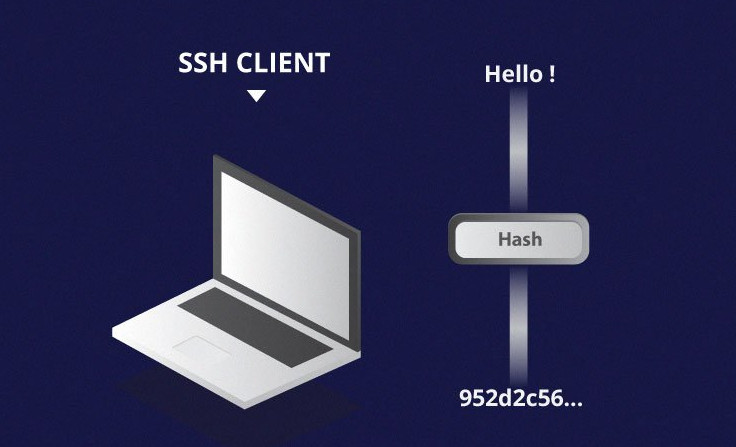
It is easy to generate a cryptographic hash from a given input, but impossible to generate the input from the hash. This means that if a client holds the correct input, they can generate the cryptographic hash and compare its value to verify whether they possess the correct input.
SSH uses hashes to verify the authenticity of messages. This is done using HMACs, or Hash-based Message Authentication Codes. This ensures that the command received is not tampered with in any way.
While the symmetrical encryption algorithm is being selected, a suitable message authentication algorithm is also selected. This works in a similar way to how the cipher is selected, as explained in the symmetric encryption section.
Each message that is transmitted must contain a MAC, which is calculated using the symmetric key, packet sequence number, and the message contents. It is sent outside the symmetrically encrypted data as the concluding section of the communication packet.
How Does SSH Work With These Encryption Techniques
The way SSH works is by making use of a client-server model to allow for authentication of two remote systems and encryption of the data that passes between them.
SSH operates on TCP port 22 by default (though SSH port can be changed if needed). The host (server) listens on port 22 (or any other SSH assigned port) for incoming connections. It organizes the secure connection by authenticating the client and opening the correct shell environment if the verification is successful.
The client must begin the SSH connection by initiating the TCP handshake with the server, ensuring a secured symmetric connection, verifying whether the identity displayed by the server match previous records (typically recorded in an RSA key store file), and presenting the required user credentials to authenticate the connection.
There are two stages to establishing a connection – first, both the systems must agree upon encryption standards to protect future communications, and second, the user must authenticate themselves. If the credentials match, then the user is granted SSH access.
Session Encryption Negotiation
When a client tries to connect to the server via TCP, the server presents the encryption protocols and respective versions that it supports. If the client has a similar matching pair of a protocol and version, an agreement is reached and the connection is started with the accepted protocol. The server also uses an asymmetric public key which the client can use to verify the authenticity of the host.
Once this is established, the two parties use what is known as a Diffie-Hellman Key Exchange Algorithm to create a symmetrical key. This algorithm allows both the client and the server to arrive at a shared encryption key which will be used henceforth to encrypt the entire communication session.
Here is how the algorithm works at a very basic level:
- Both the client and the server agree on a very large prime number, which of course does not have any factor in common. This prime number value is also known as the seed value.
- Next, the two parties agree on a common encryption mechanism to generate another set of values by manipulating the seed values in a specific algorithmic manner. These mechanisms, also known as encryption generators, perform large operations on the seed. An example of such a generator is AES (Advanced Encryption Standard).
- Both the parties independently generate another prime number. This is used as a secret private key for the interaction.
- This newly generated private key, with the shared number and encryption algorithm (e.g. AES), is used to compute a public key which is distributed to the other computer.
- The parties then use their personal private key, the other machine’s shared public key and the original prime number to create a final shared key. This key is independently computed by both computers but will create the same encryption key on both sides.
- Now that both sides have a shared key, they can symmetrically encrypt the entire SSH session. The same key can be used to encrypt and decrypt messages (read: section on symmetrical encryption).
Now that the secured symmetrically encrypted session has been established, the user must be authenticated.
Authenticating the User
The final stage before the user is granted SSH access to the server is authenticating his/her credentials. For this, most SSH users use a password. The user is asked to enter the username, followed by the password. These credentials securely pass through the symmetrically encrypted tunnel, so there is no chance of them being captured by a third party.
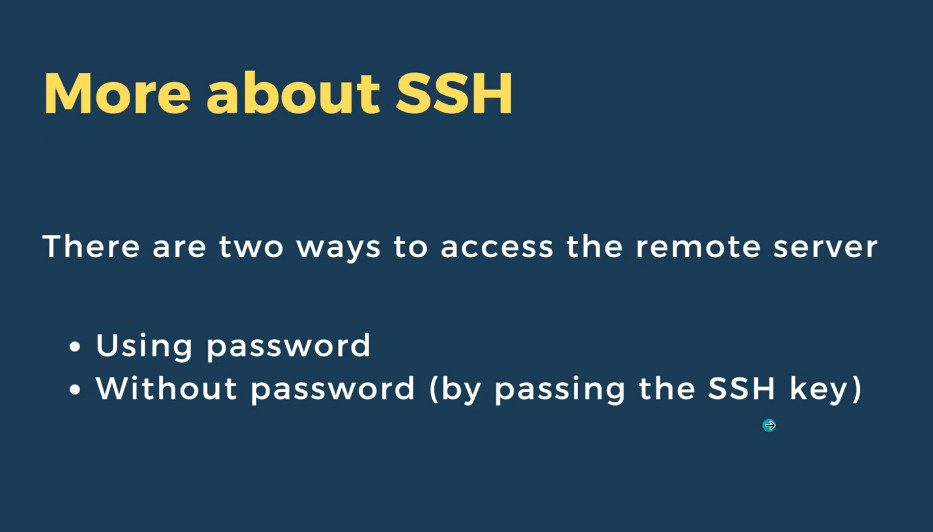
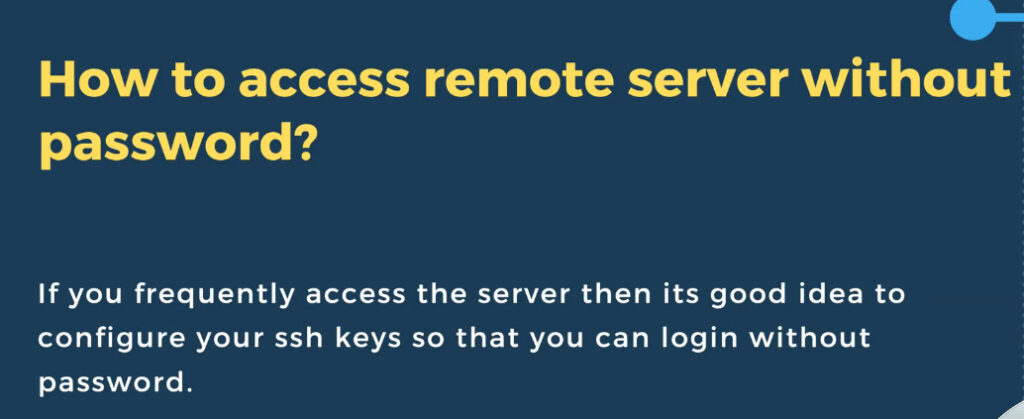
Although passwords are encrypted, it is still not recommended to use passwords for secure connections. This is because many bots can simply brute force easy or default passwords and gain shell access to your account. Instead, the recommended alternative is SSH Key Pairs.
These are a set of asymmetric keys used to authenticate the user without the need of inputting any password.
Why Is SSH Used?
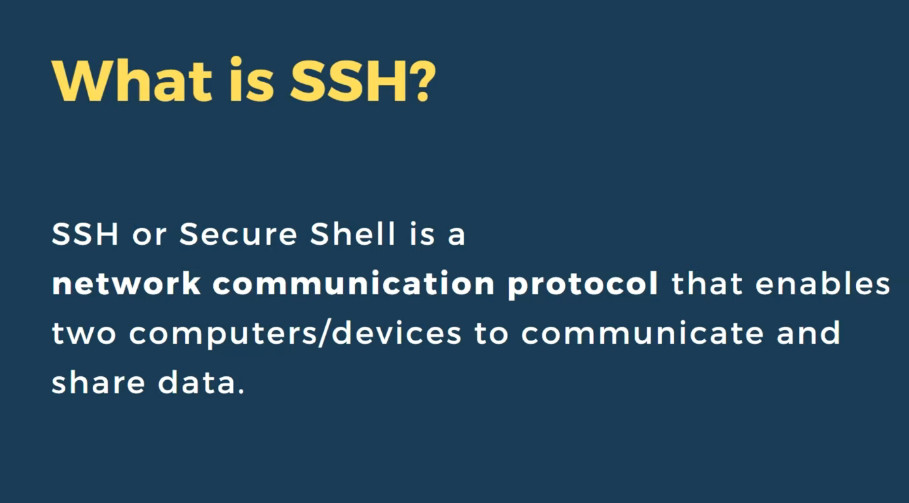
Secure Shell (SSH for short) is a network communication protocol that makes it possible for two computers to communicate with one another. SSH also makes data transfers possible between two computers.
Allow Or Deny Selected Users/Groups To Login Via SSH
We will also learn how to disable SSH root login in Linux. Disabling SSH root login enhances security by mitigating the risk of brute force attacks against the root account, which, if compromised, grants full control over the system.
Introduction
A while ago, we discussed how to limit a user’s access to Linux system using Restricted shell. Once we have put the users in restricted mode, they can’t do anything except what they are allowed to do.
It will be helpful when you want to allow a particular user to execute only a specific set of commands.
In this article, we are going to enable or disable SSH access for an user or group by making a few changes in SSH default configuration file.
Allow or Deny SSH Access to a Particular User or Group in Linux
The openSSH default configuration file has two directives for allowing and denying SSH access to a particular user(s) or a group.
First, let us see how to allow or enable SSH access to an user and group. Please note that all commands given below should be run as root or sudo user.
1. Allow SSH Access to a User or Group
To allow SSH access for a particular user, for example sk, edit /etc/ssh/sshd_config file:
Commnd
					sudo nano /etc/ssh/sshd_config

modify the following line:

AllowUsers sk
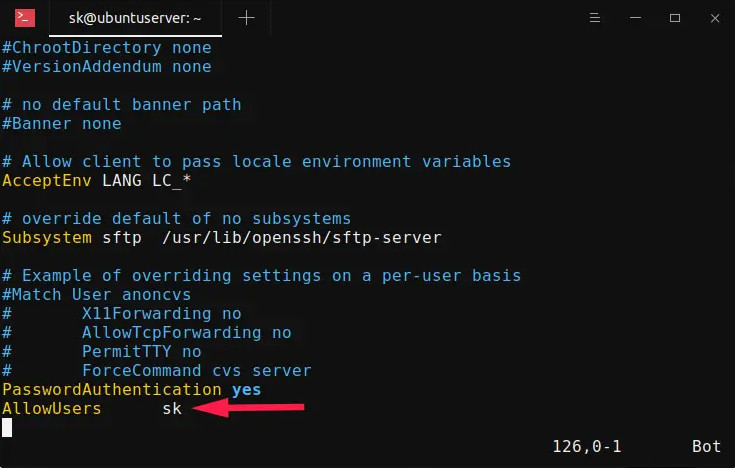

Replace “sk” with your username. Please mind the space indentation between “AllowUsers” and “sk“. You should use Tab instead of Space-bar. Meaning – add the word “AllowUsers” and hit the Tab key and then specify the username.
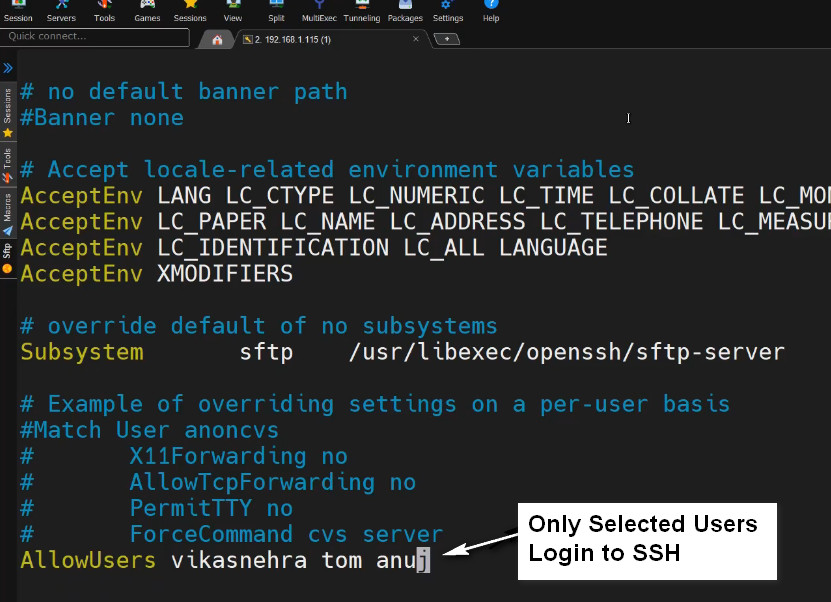
You can also specify more than one user as shown below.
AllowUsers user1 user2
To allow SSH access for an entire group, say for example root, add/edit the following line:
AllowGroups root
This setting will allow all the members of the "root" group to ssh to the Linux server
sudo systemctl restart sshd
Now, the user sk and all the members of the "root" group are allowed to ssh into your Linux server. The other users (except sk and members of "root" group) are not allowed to access the system via ssh.
To verify it, try to ssh into the Linux server as any one of the non-allowed user
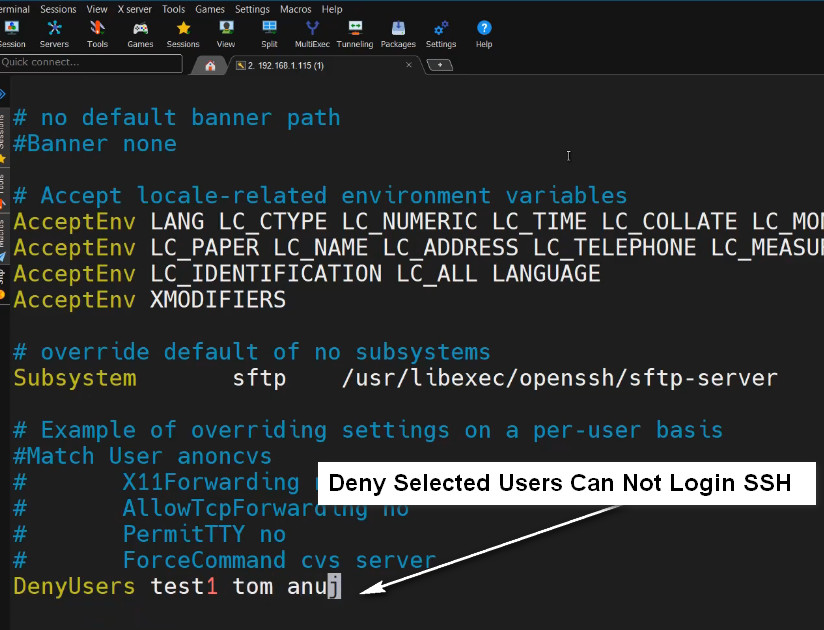
2. Deny SSH Access to a User or Group
To disable or deny SSH access to an user or group, you need to add/modify the following directives in your remote server’s /etc/ssh/sshd_config file.
- DenyUsers
- DenyGroups
To deny SSH access to specific user called “sk”, edit /etc/ssh/sshd_config file:
sudo nano /etc/ssh/sshd_config
Add/edit the following line:
DenyUsers sk
Make sure the space indentation is correct. Don’t use Space-bar. Press Tab key and add the username.
Similarly, to deny SSH access to multiple users, specify the usernames with space separated as shown below.
DenyUsers user1 user2
Likewise, to deny SSH access to an entire group, for example root, add:
DenyGroups root
Save and quit the ssh config file. Restart ssh service to take effect the changes.
sudo systemctl restart sshd
SSH Root Login Disable
3. Disable SSH Root Login
Root ssh access is considered a bad practice in terms of security. So it is strongly recommended to disable SSH Root user login to secure your system.
To disable root ssh login, edit /etc/ssh/sshd_config file:
sudo nano /etc/ssh/sshd_config
Find the following line, Uncomment it, and set the value to no.
PermitRootLogin no
Restart SSH service to take effect the changes immediately:
sudo systemctl restart sshd
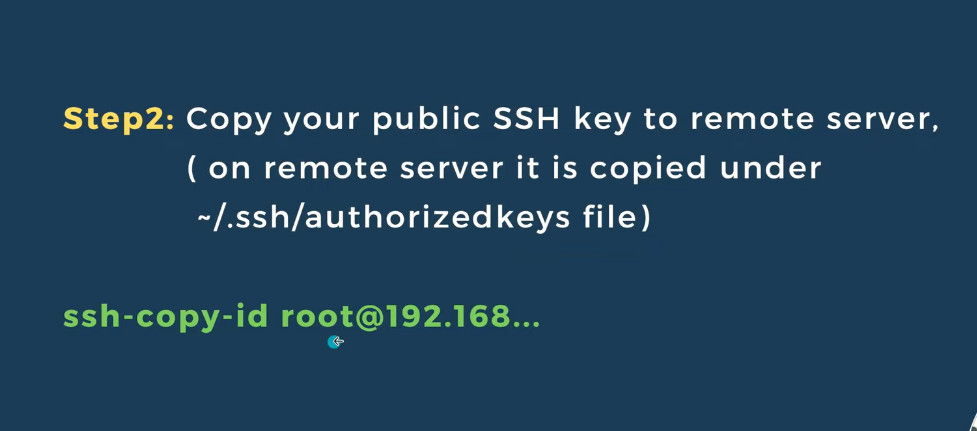
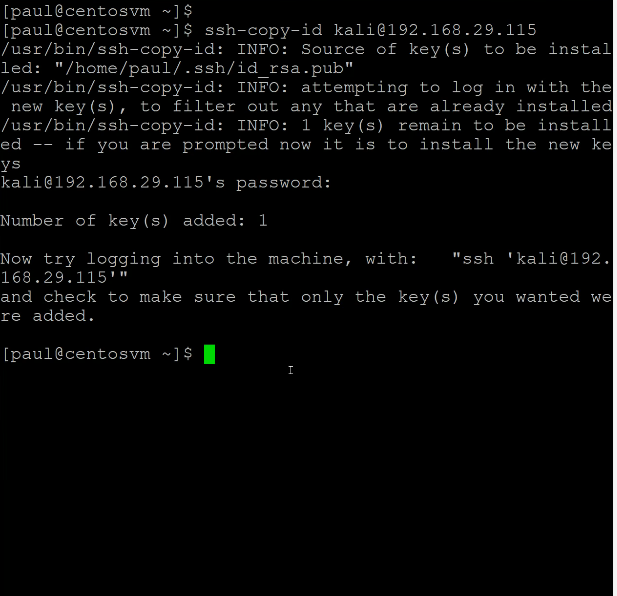
SSH Login Without a Password
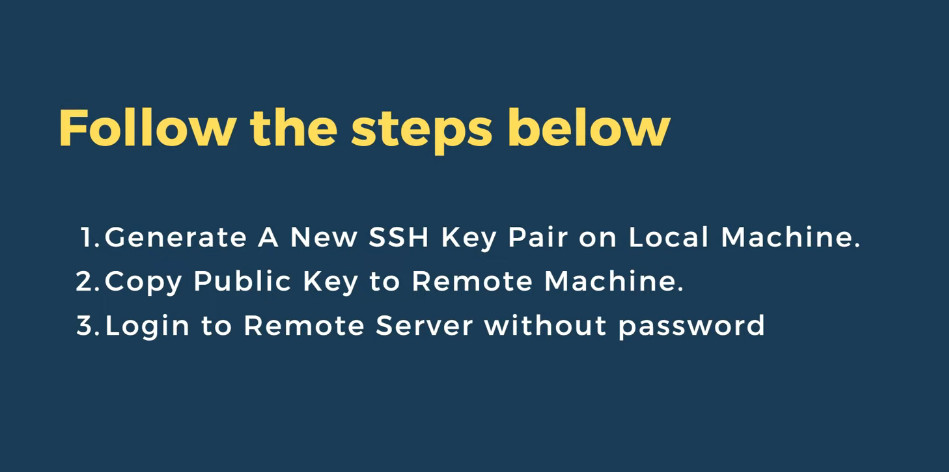
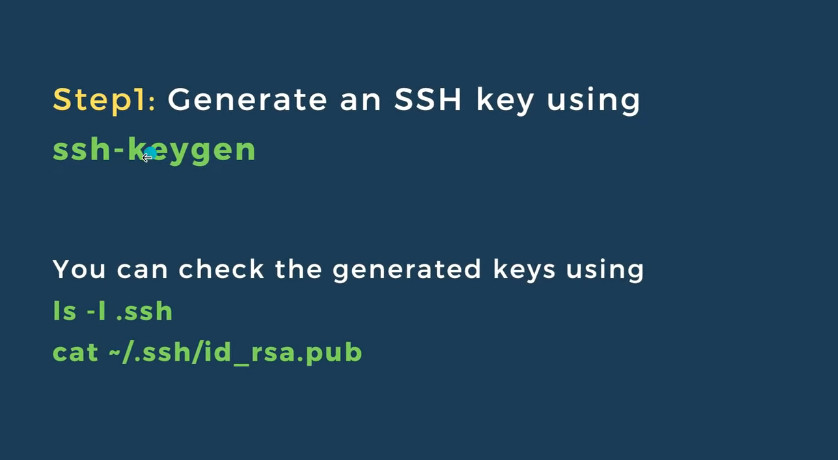
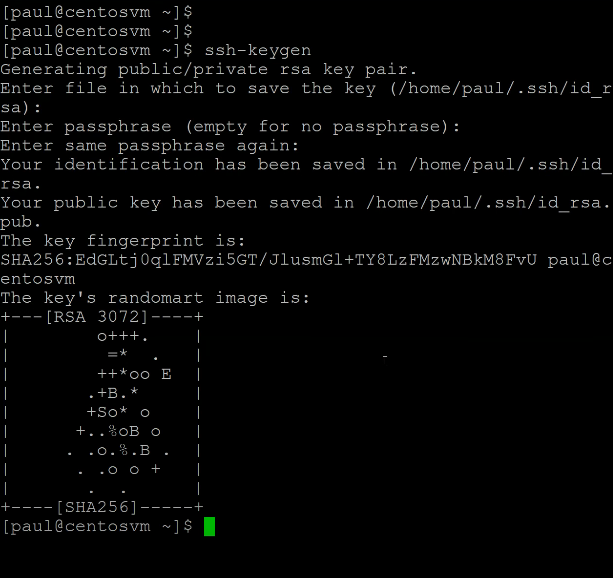
					ssh-keygen
ls -l .ssh
cat -/.ssh/id_rsa.pub

ssh-copy-id root@192.168.1.200